|
|
本帖最后由 yenan1001 于 2017-4-15 00:26 编辑
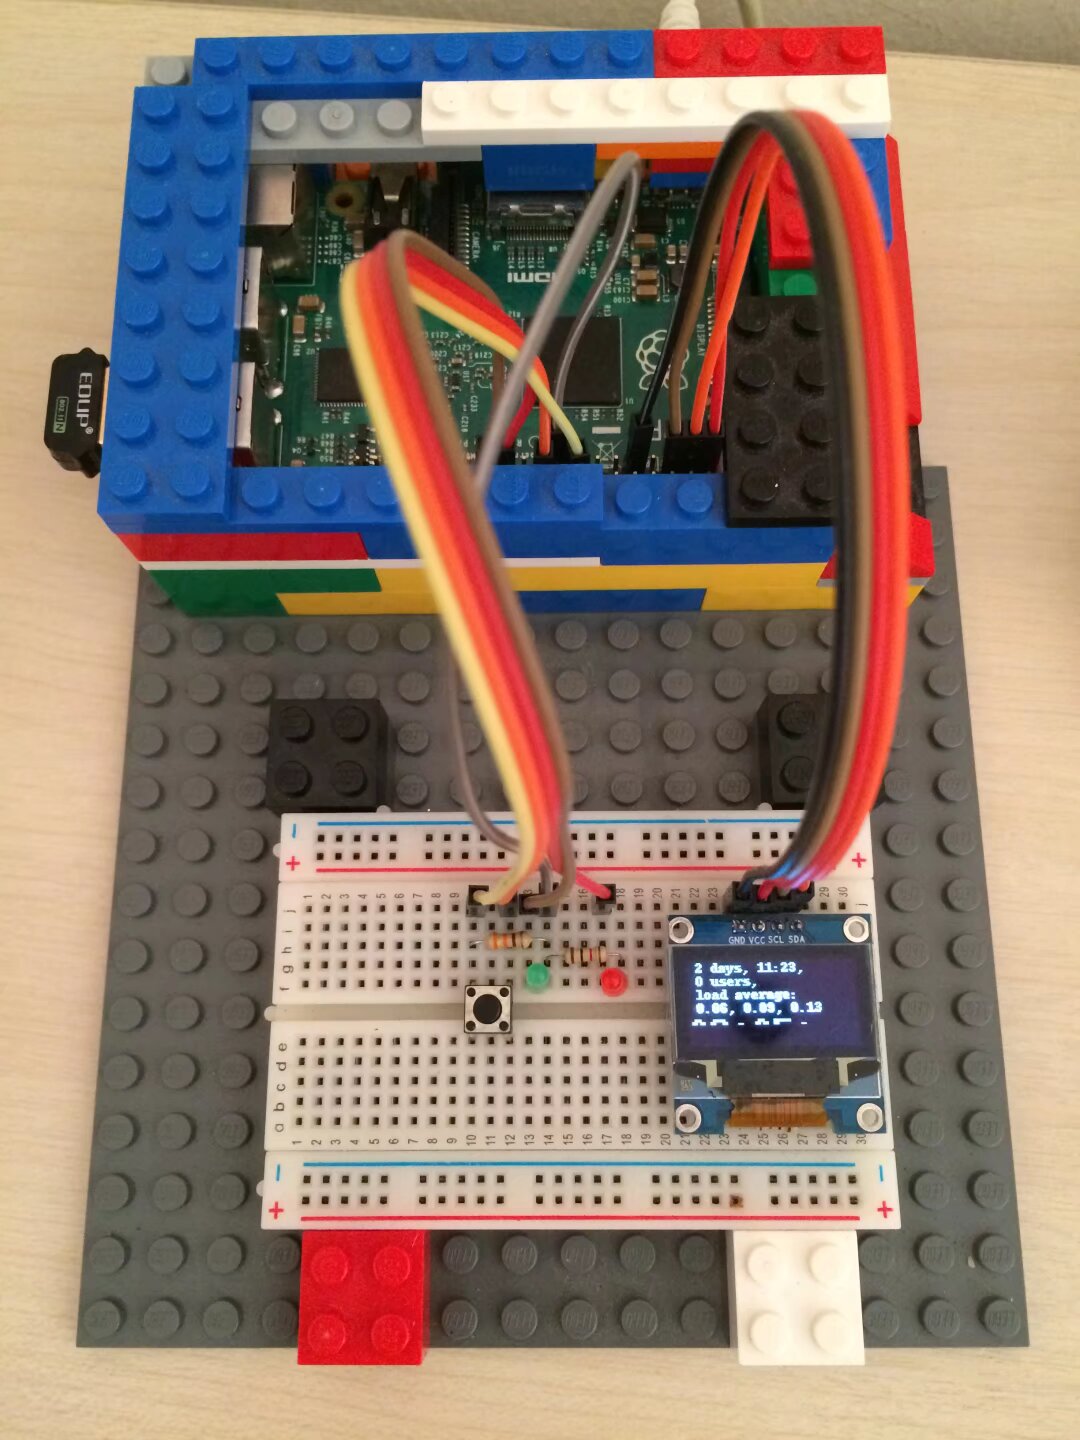
最近用不用的124x64的OELD屏做了个系统状态显示器,可以显示uptime的输出。
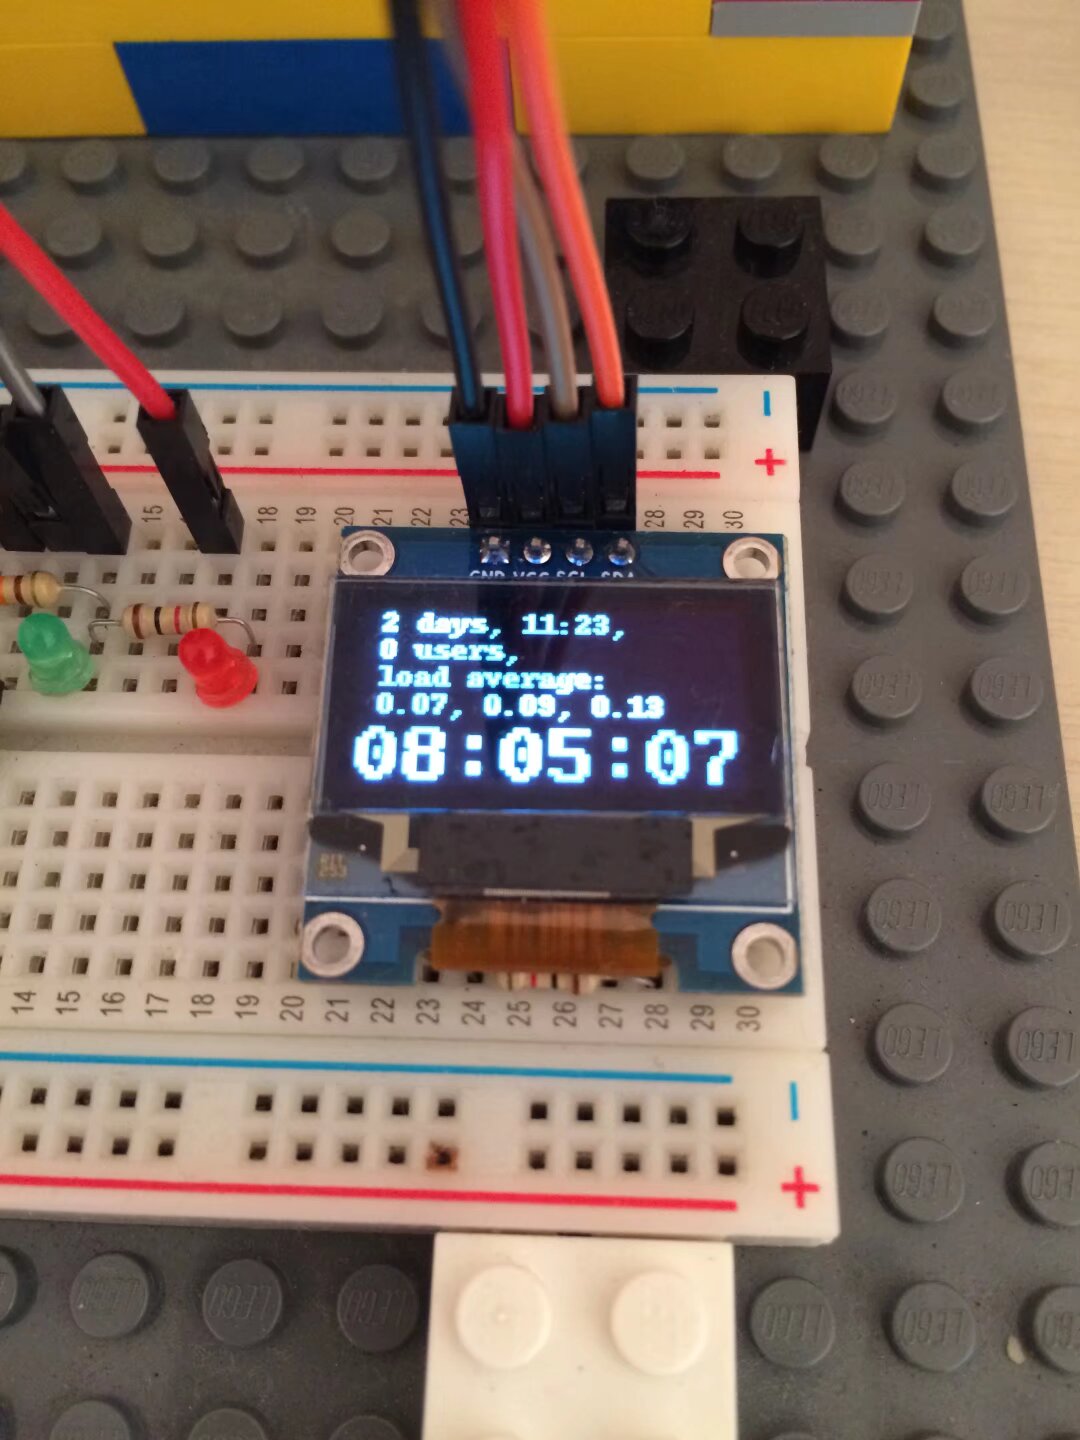
这个是整个系统,因为刚好屏幕刷新,最后一行时间没有显示完。
用的这个library.(另外,这个网站还介绍了几个其他不错的库,可以选一个用)
https://learn.adafruit.com/ssd13 ... bone-black?view=all
我自己的代码主要是分隔字符串显示的工作。
[pre lang="python" line="1"]
import time
import os
import sys
import Adafruit_GPIO.SPI as SPI
import Adafruit_SSD1306
import Image
import ImageDraw
import ImageFont
# Raspberry Pi pin configuration:
RST = 24
# Note the following are only used with SPI:
DC = 23
SPI_PORT = 0
SPI_DEVICE = 0
# 128x32 display with hardware I2C:
#disp = Adafruit_SSD1306.SSD1306_128_32(rst=RST)
# 128x64 display with hardware I2C:
disp = Adafruit_SSD1306.SSD1306_128_64(rst=RST)
# Note you can change the I2C address by passing an i2c_address parameter like:
# disp = Adafruit_SSD1306.SSD1306_128_64(rst=RST, i2c_address=0x3C)
# Alternatively you can specify an explicit I2C bus number, for example
# with the 128x32 display you would use:
# disp = Adafruit_SSD1306.SSD1306_128_32(rst=RST, i2c_bus=2)
# 128x32 display with hardware SPI:
# disp = Adafruit_SSD1306.SSD1306_128_32(rst=RST, dc=DC, spi=SPI.SpiDev(SPI_PORT, SPI_DEVICE, max_speed_hz=8000000))
# 128x64 display with hardware SPI:
# disp = Adafruit_SSD1306.SSD1306_128_64(rst=RST, dc=DC, spi=SPI.SpiDev(SPI_PORT, SPI_DEVICE, max_speed_hz=8000000))
# Alternatively you can specify a software SPI implementation by providing
# digital GPIO pin numbers for all the required display pins. For example
# on a Raspberry Pi with the 128x32 display you might use:
# disp = Adafruit_SSD1306.SSD1306_128_32(rst=RST, dc=DC, sclk=18, din=25, cs=22)
# Initialize library.
disp.begin()
while 1:
# Clear display.
disp.clear()
disp.display()
# Create blank image for drawing.
# Make sure to create image with mode '1' for 1-bit color.
width = disp.width
height = disp.height
image = Image.new('1', (width, height))
# Get drawing object to draw on image.
draw = ImageDraw.Draw(image)
# Load default font.
default_font = ImageFont.load_default()
# Alternatively load a TTF font. Make sure the .ttf font file is in the same directory as the python script!
# Some other nice fonts to try: http://www.dafont.com/bitmap.php
font = ImageFont.truetype('Perfect_DOS_VGA_437.ttf',29)
sysinfo = os.popen('uptime').read()
strtime, strdate = sysinfo.split('up')
strdate, strtemp = strdate.split('user')
strdate = strdate[:-2]
struser = sysinfo[-42:-31]
strload = sysinfo[-18:]
# Write two lines of text.
draw.text((0, 40), time.strftime("%X",time.localtime(time.time())) , font=font, fill=255)
draw.text((0, 0), strdate , font=default_font, fill=255)
draw.text((0, 10), struser , font=default_font, fill=255)
draw.text((0, 20), ' load average:' , font=default_font, fill=255)
draw.text((0, 30), strload , font=default_font, fill=255)
# Display image.
disp.image(image)
disp.display()
time.sleep(5)
[/code] |
|


 发表于 2015-8-2 01:39:06